How to properly install and operate Lift Scales

Lift Scales are designed to be attached to patient lift systems, allowing for weight measurement as part of normal lift or transfer process. Routine measurement of patient weight is essential, particularly when it comes to determining appropriate medication dosage - guessing and estimation is simply too risky!
To ensure patient safety, Lift Scales should be installed and operated according to procedure. Incorrect installation and operation may result in breakage, which is a severe potential hazard!
This quick guide will highlight 4 key points to check when using Lift Scales!
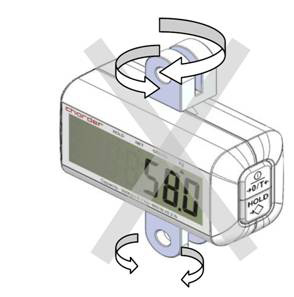
(1) Lift Scale must not tilt at any time
If Lift Scale is tilted and not completely vertical when installed, this will cause the joints of the Lift Scale to bend. This will eventually cause breakage once used enough times and subjected to enough weight, because force is being applied against joints in a way that they aren't designed to handle.
Even if Lift Scale is completely vertical when installed, if it is bent at any point in operation (such as when the patient is lifted), the same risk of breakage applies!

After installation check and make sure that the Lift Scale remains completely straight, even when the lift has been raised to its highest level!

(2) Install on lift systems that allow for free movement
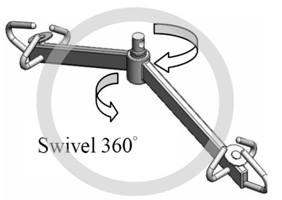
One of the best ways to avoid damaging the connecting joints is to make sure connection points can move freely at any time, avoiding tension in a bent position.
For example, although the newer MHS2510 models feature 360-degree swiveling joints (compared to the older MHS2500 which uses a static design), installation on a lift system that allows for full free swivel itself is recommended!

(3) Make sure joints are undamaged
Before usage, joints should be visually inspected for bending - if any visual damage or bending is observed, do NOT use the Lift Scale! In addition, we recommend manually checking to see if incorrect looseness is observed (ex: wobbling rather than rotation).
For example, the MHS2500 has a non-rotating joint design - if it can be manually twisted in any direction, that means the joint(s) may be damaged!

(4) Make sure screws are tightened properly
Screws should be regularly inspected to make sure they are tightened correctly according to specifications. The Lift Scale can be as sturdy as ever, but if it is not attached correctly, then it could still possibly fall off from the lift system!
The correct way to tighten the nylock screws requires one hexagon screwdriver and one torque wrench.
1. Hold/fix one side using screwdriver. This is important because if counter-force is not applied using the screwdriver, the nylock screw will not tighten, and will simply rotate in place when the torque wrench is applied.
2. Tighten/attach Nylock Screws using torque wrench (repeat from other side)
IMPORTANT: Torque strength must be set at 18kgf-cm ± 1kgf-cm

3. Repeat for bottom joint.
If you are unsure if your lift system is compatible with Charder's Lift Scales, please feel free to contact us!


